Behind the Scenes of Yoga With Adriene: Cameras & Gear
+ the photo I posted that shattered our "invisible" production style and made us rethink our approach to behind-the-scenes content.
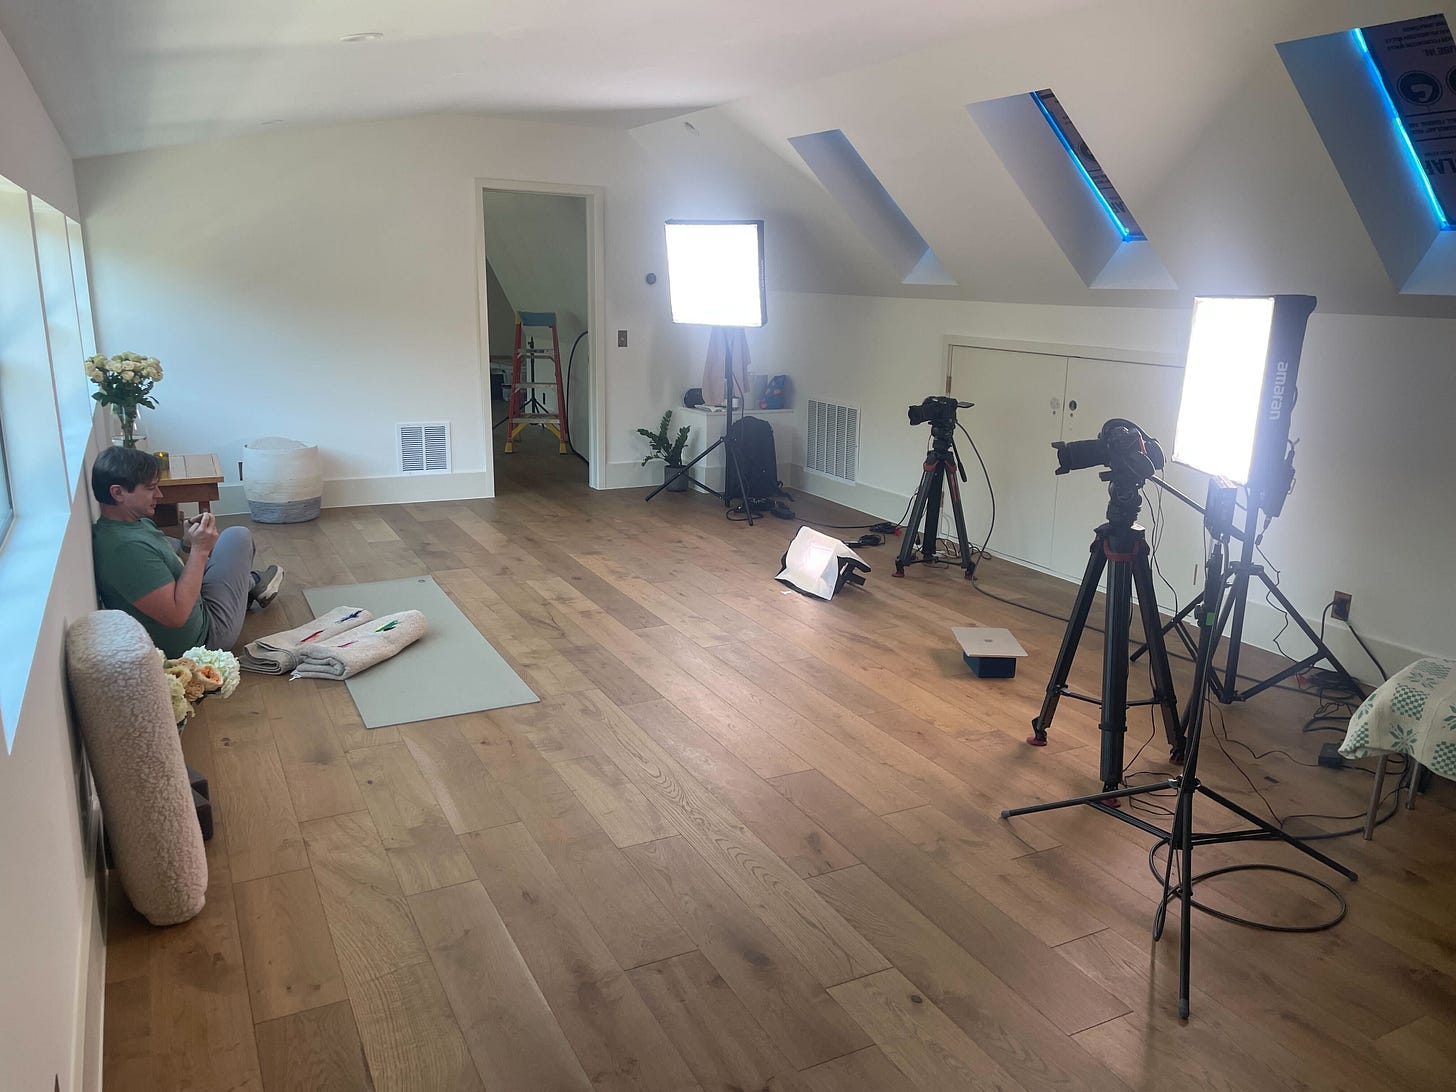
I just got home from a work trip to Austin, where we were in production on videos for Yoga With Adriene and Find What Feels Good. We made videos with Adriene on the first day in our primary production space. Our production team had built in a little extra time to tweak lighting and explore some new potential set-ups.
I snapped a photo while Grant was rolling cameras on Adriene and Benji. The cords are a little less tidy than usual, but that’s because we had been moving everything around and experimenting just moments before.
The electric fly swatter is always funny to me. But the flies are still out in full force in Texas and can ruin a shot. We even had a wasp make an appearance.
Other than that, I didn’t give the photo much thought. I uploaded it to the FWFG community, where we are all currently investing a lot of energy.
The response was not what I expected. Members were a little taken aback to see so much happening behind the scenes. We’ve always wanted our production to be as “invisible” as possible. Apparently, we’ve done a great job.
Our audience does feel like they are in a room with Adriene and Benji. However, the fact that other people were there (and cameras, cables, and lights) shattered the illusion.
It was great feedback.
It let us know that the “invisible” production style was working.
It also informed us that the community might not be the best place for this behind-the-scenes content.
Luckily, I can get all that out of my system here!
Keeping It Simple
“What cameras do you use to make the Yoga With Adriene videos?”
“What do I recommend for people who want to make their own videos but are just getting started?”
I’ve been asked both of these questions hundreds of times.
First, I have to make a disclaimer. I’m not the one who shoots or edits these videos anymore. Grant Harling is our head of production. He not only flies to Austin to record them, but he also supervises the entire post-production process. He’s amazing. He even took most of the photos in this post.

But I love to talk about cameras, and I’m the one who chose these.
So let’s get into it.
We have now produced over 1,000 videos, and our setup has evolved. Since we make so many videos, the entire process—from setup to post-production—must be as fast and seamless as possible. Today, the image quality of even entry-level cameras is fantastic. You don’t need to spend a lot of money. For my personal/experimental projects, I’ve been shooting almost exclusively with an iPhone 15 Pro, and I’ve been thrilled with the image quality and the editing workflow.
However, for our workflow, when knocking out 5+ videos daily, we need to ensure there are as few glitches as possible. We also want to make sure everything sails through our post-production workflow. That’s the primary reason for using professional (and expensive) gear.
If you’re just starting, I recommend keeping things as simple as possible and working to improve a little each time you make a video. Then, you can gradually refine and add new gear to enhance the quality and speed up your workflow.
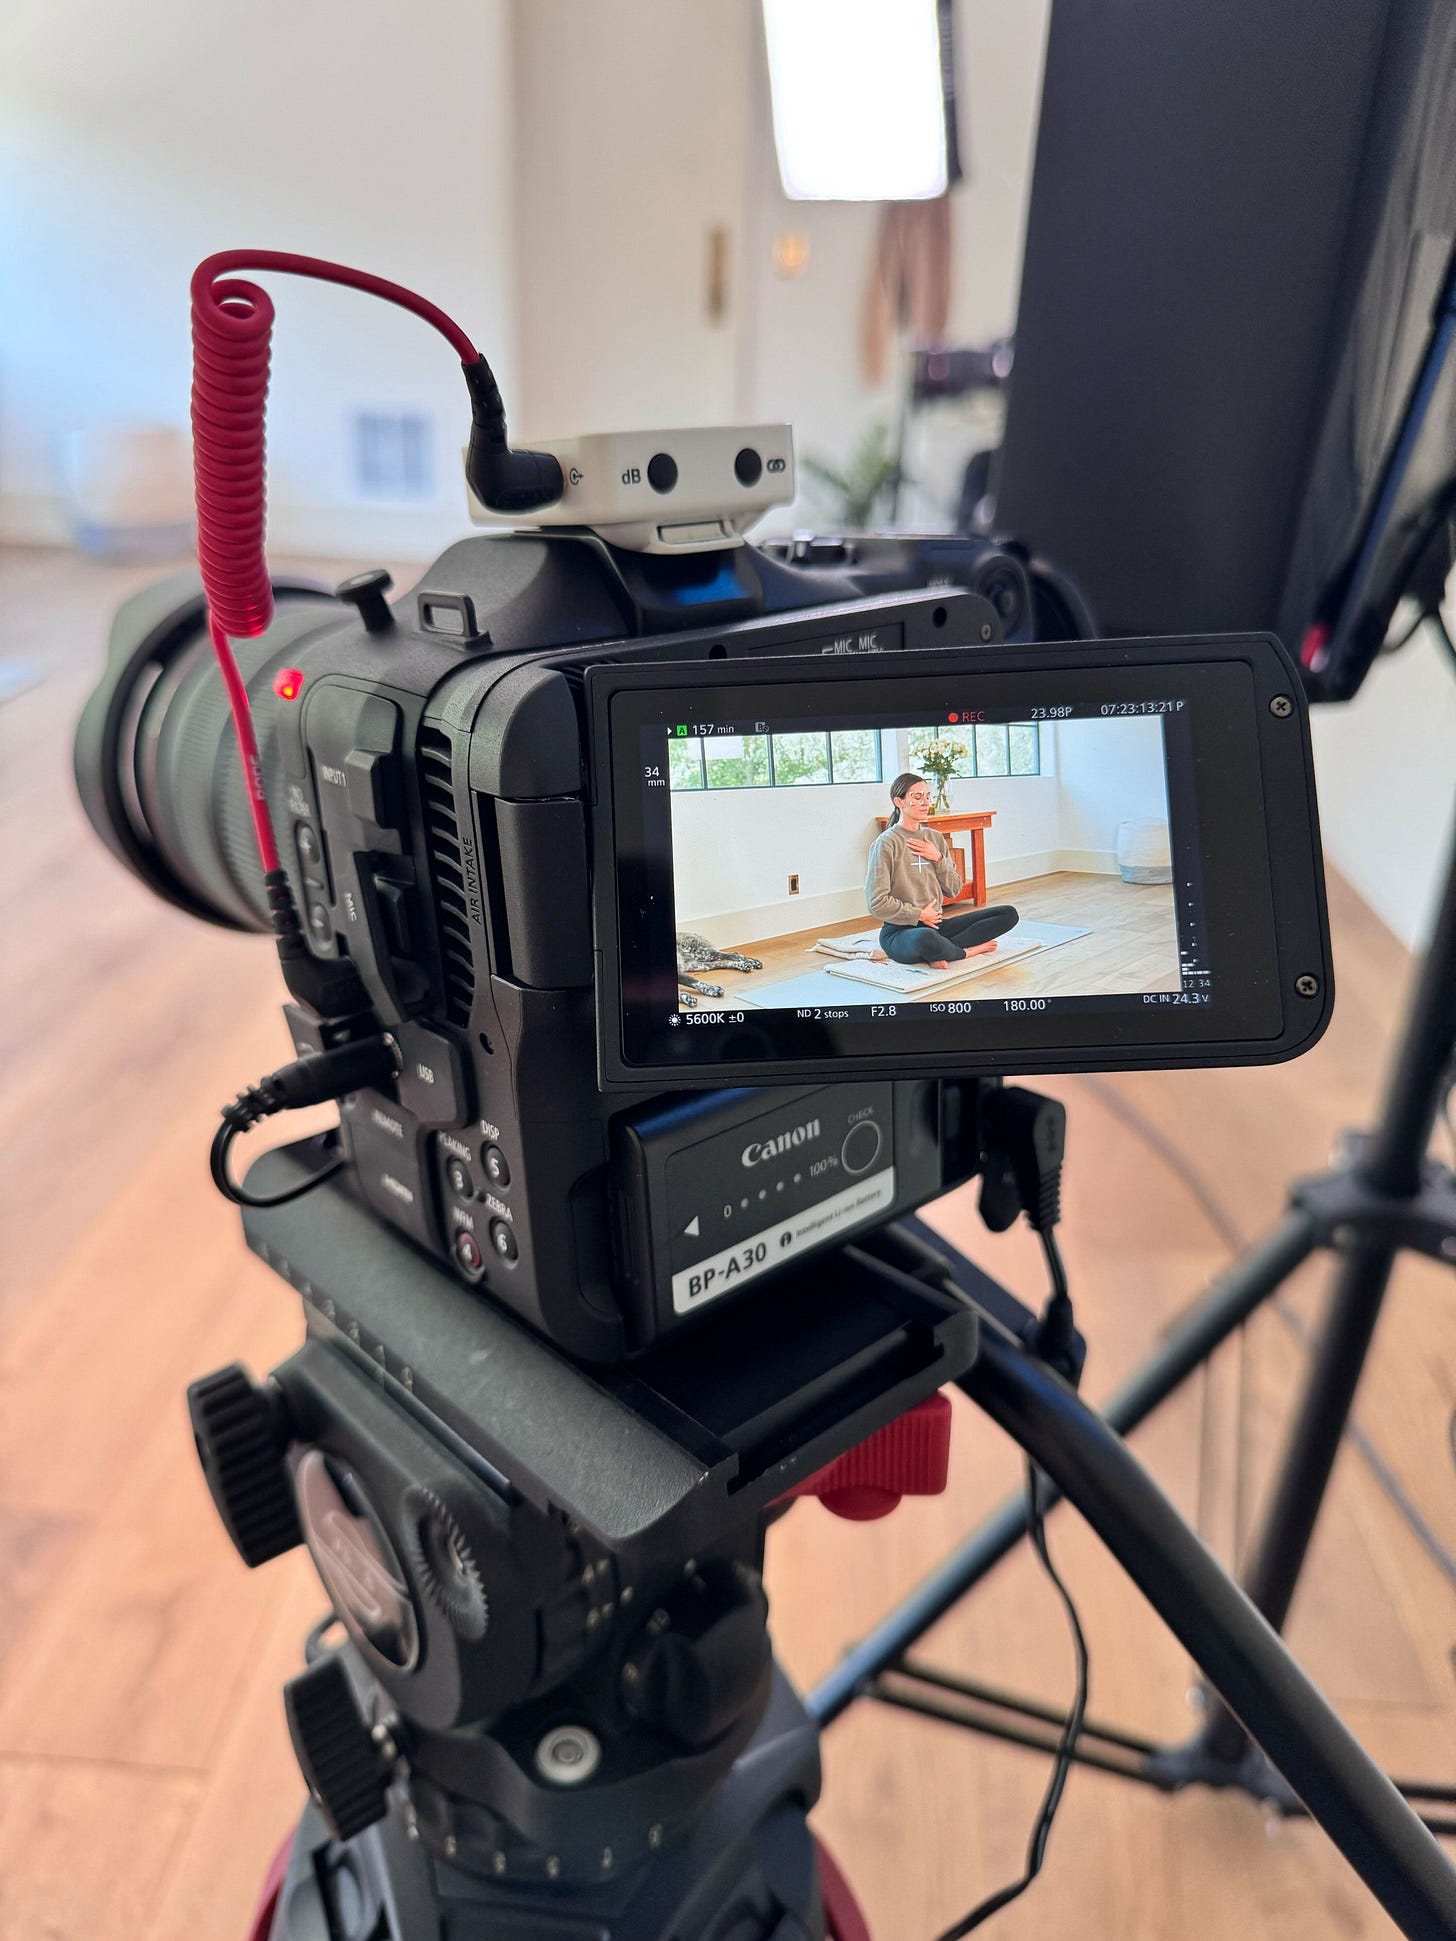
Our Main Camera: Canon EOS C-300 Mark III

We shoot with 2 Canon C-300s so that we always have a wide shot (A-camera) and a second angle (B-camera) to which we can cut away. We’ve had these cameras since 2020, and they still feel like they’re on the cutting edge.
We first moved into Canon's cinema line with the C100 and eventually upgraded to the C200 and now the C300 Mark III. Since we are still a small team working in a small space, we often have one camera operator to run two cameras. We keep the A-camera locked off in a wide shot and then manually operate the B-camera in a roving medium shot. Shooting in 4K gives us a little more margin for error.
These cameras are workhorses - we have shot hundreds of videos with them. If we set up everything right in-camera, the footage cuts together seamlessly and doesn't require much extra post-production work. These cameras are relatively big (and expensive), so they stay in the "studio," and we have a smaller kit for when we are out on the road.
If you don't need to shoot in 4K, I still highly recommend the C100 Mark II. I love the ergonomics, and there's something about the image straight out of the camera that is a little more pleasing in some ways than the C300. Plus, you can find used ones that are very inexpensive.
Our Non-Studio Camera: Canon C70
This is similar to the C300 Mark III but a lot smaller. It uses the same 4K Super 35mm DGO sensor, so we can easily match footage.
The major difference is that this camera has the newer RF mount instead of the legacy EF mount, so the lenses are different. However, we can use an adapter if we want to use our older lenses.
The size of this camera makes it perfect for run-and-gun travel-style shooting. However, we also use it as the primary camera for the YWA videos in Adriene’s new space. The space is smaller than her previous room, and the smaller camera footprint makes a big difference.
Adriene’s Vlogging Camera: DJI Osmo Pocket 3
Adriene's vlogs for FWFG members are some of our most popular videos. For years, she’s recorded them with different point-and-shoot cameras. But she frequently ran into little annoying quirks, especially with the sound.
Grant and I have been testing the DJI Osmo Pocket 3 in Los Angeles and on the road. We’ve been blown away by what is possible with such a tiny setup, so we got one for Adriene to use for her vlogs. The increase in quality and ease of use has been substantial. The Pocket comes with a wireless mic that sounds great and is very easy to use. You just clip it on, and it works.
The real selling point of this camera is the gimbal for stabilization. Using the app, you can even have it follow you around and keep you in the frame. This is great for vloggers and anyone who needs to self-record a video.
Highly recommended!
Audio

It has been amazing to watch microphone technology advance and miniaturize. These are so tiny! We started with Sennheiser wireless lav kits, which were the industry standard but now seem unbelievably big and clunky. We’ve been experimenting with two different mic kits.
Rode Wireless Go
Hollyland Lark Max
The quality is excellent on both, but sometimes, depending on the instructor's clothes, one of the transmitters might be a little easier to work with. Currently, the Rode is the slight favorite, but both are excellent.
For the Microphone - we use a Sunken COS-11D. We’ve been using this for years. The wire is tiny, and the quality is outstanding.
We attach the mic directly to the talent with Rycote Undercovers.
Lighting

That covers the big stuff. There are always a lot of other little odds and ends that are inevitably part of production, but those would be too tedious to write about here.
We haven’t changed cameras in quite a while and are still very happy with this setup. I’ll keep you posted if anything changes.
I’d love to hear what you use to make YOUR videos. Are there any cameras or other video creation tools you’re excited about? Reply to this email or leave a comment to let me know.


Thank you for sharing Chris! I'm a FWFG member and personally I love seeing these BTS shots!
Hi Chris,
I also tried rode with the sanken. But the volume is just not loud enough (at all!). What is your experience, because the audio of the videos that you shoot for Yoga with Adriene seem loud enough. Do you have any recommendations on that? Do you do anything with the sound after recording to adjust the volume?
I have to say I use it with my macbook air, but that shouldn't be the problem.